
Creating your first portal should be quick and fun. In just a couple of minutes, you’ll design a space where you can securely share files, add useful information, and invite your clients to collaborate.
In this guide, we’ll walk through the essential steps: building your layout, customizing the look, and finally sharing it with your client.
Let's create this portal.
To do so, you need to access what we call the portal editor.
It all starts by a click on a button:
Get StartedEditor Overview
Let’s take a quick tour so you know where everything is.
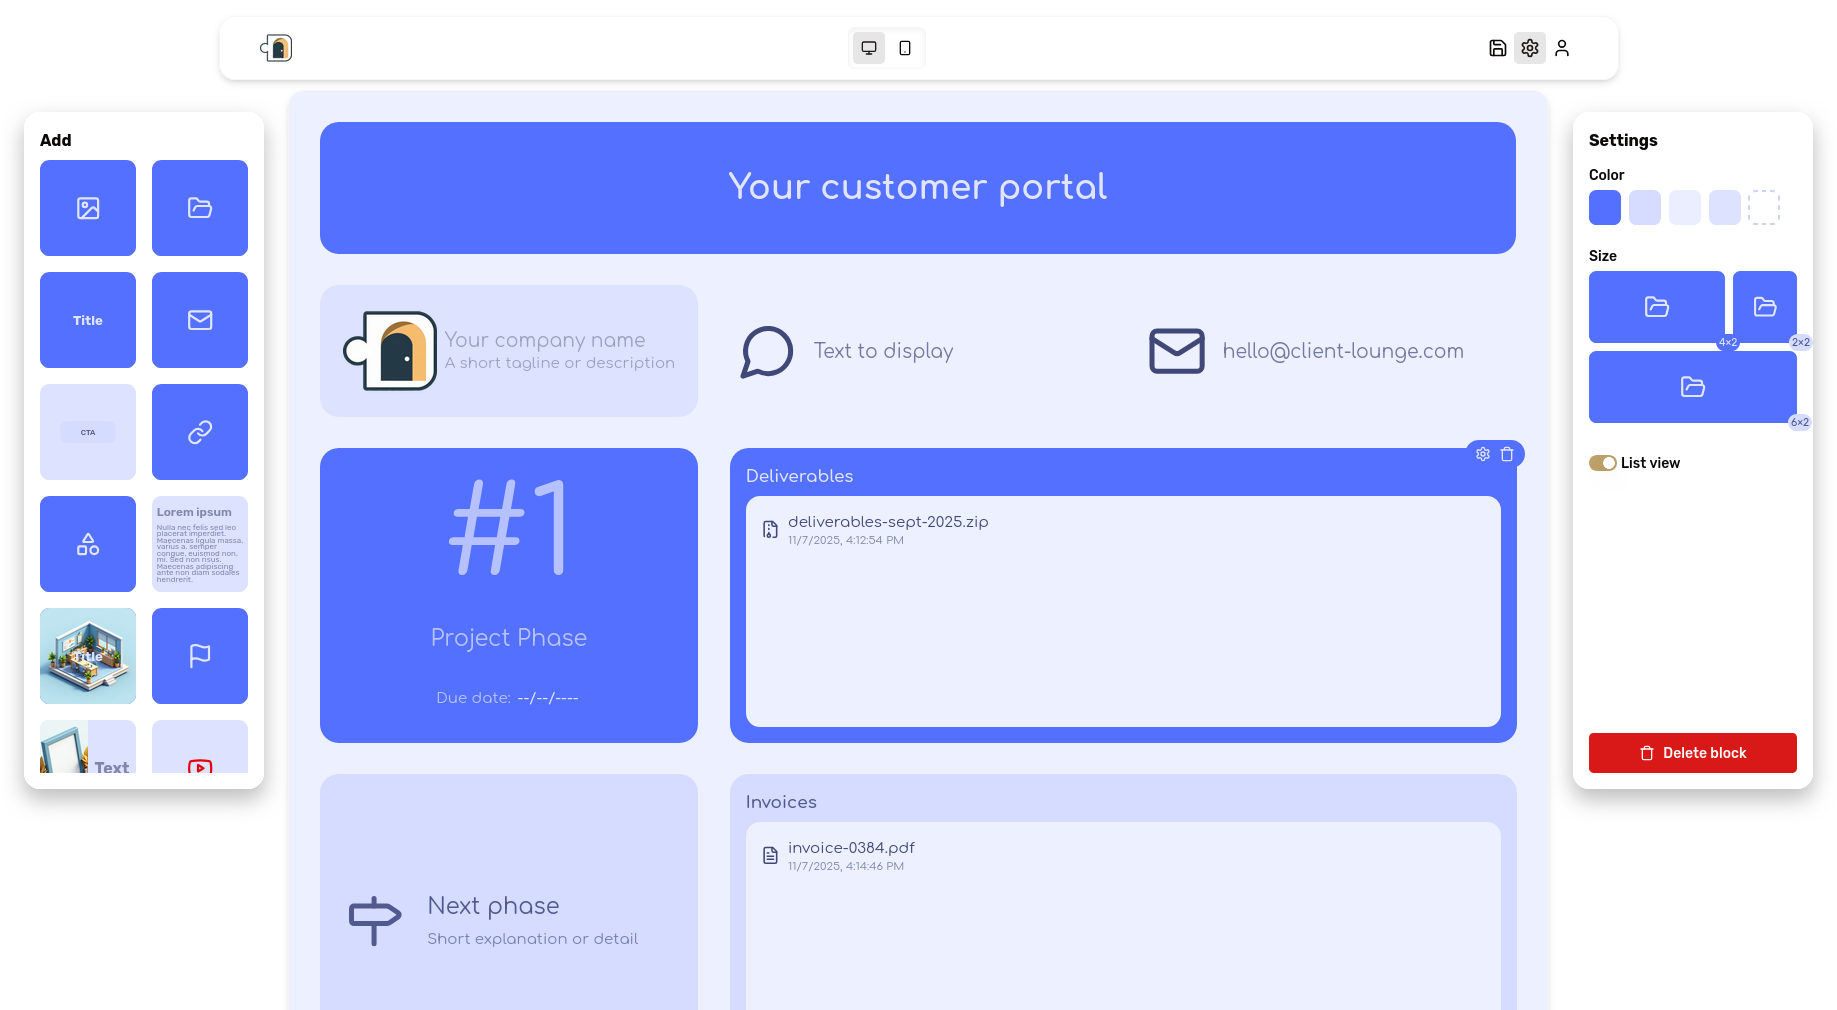
The window opened by the above button should like this:
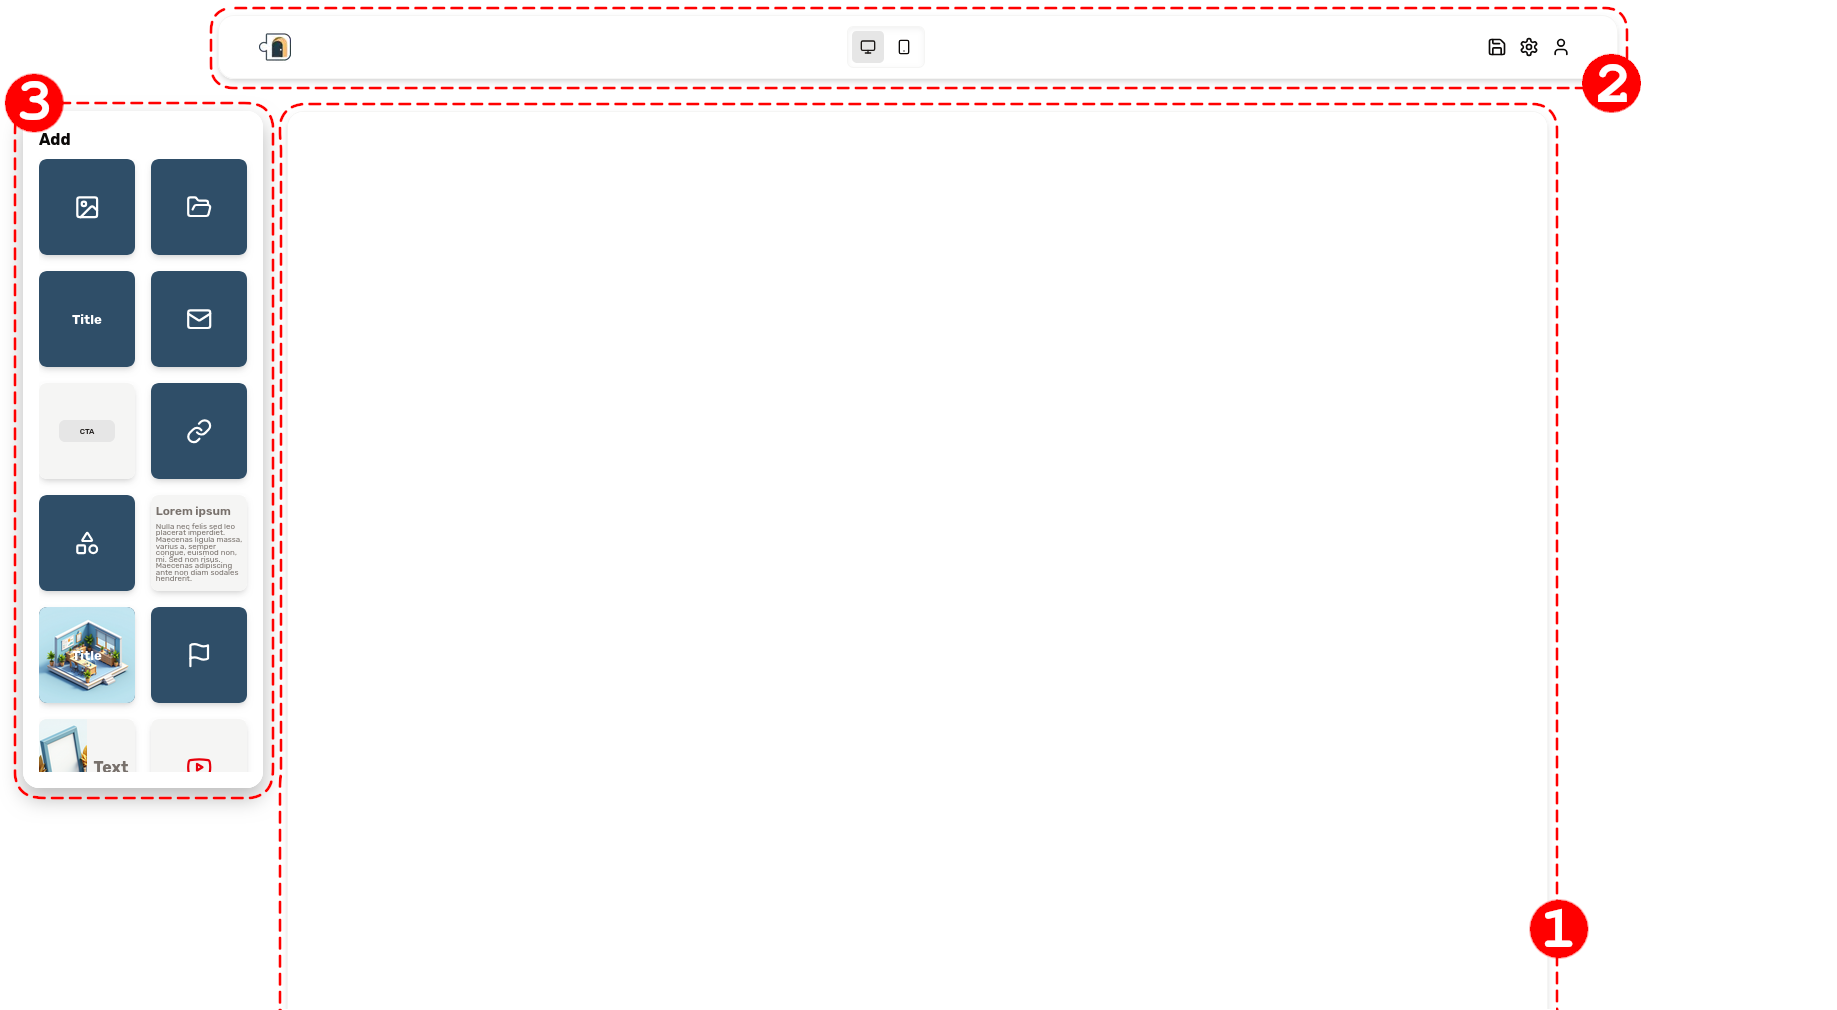
It's composed of 3 elements:
- the canvas, which occupies the main central space of the screen. Your portal will be built on the canvas.
- the toolbar, laid horizontally, floating above the canvas on top of the screen. The buttons in the middle let you switch between the mobile view and the desktop view. The buttons on the right are for saving, accessing the settings, and opening the menu.
- the palette on the left, to add new blocks
Adding a block
The first thing we need to do is add content blocks for this portal. Available blocks are exposed in the left side palette; we offer a number of blocks, feel free to experiment by yourself. Learn more about the available blocks in our dedicated article.
You need to pick a block. For example, the "title" block is a good start. Just click the block and it will be added to the canvas; you can also drag a block onto the canvas to add it.
Don’t worry — you can always move or delete blocks later. Blocks can simply be moved by dragging them around.
Block options & settings
As you can see, as your mouse hovers over a block, it offers several options:
- You can click any piece of text to edit it
- A small tooltip appears on the top right corner of the block. It has two buttons:
- one with a small cog to open the block settings
- the other one with a trash bin, to remove the block.
If you click the small cog button, it will open a panel at the right of the canvas. This exposes the settings of the currently selected block. When no block is selected, the settings of the portal itself can be changed here, we'll get to that later.
This settings panel looks like this:
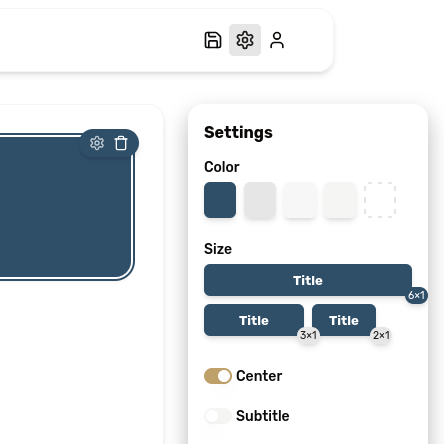
Each block lets you pick its color and size. Some blocks offer additional settings. For example, here the title block lets you add a subtitle and decide whether the text is to be centered or not.
Sharing files
Sharing files is a core feature of Client Lounge. We let you securely upload files to your portals, which is a very convenient way to safely share invoices, contracts or deliverables with your customers.
In order to share files, you need to add a "directory" block. It has a small folder icon on it.

Once you've added the directory block, it should look like this:

When you go over this block with your mouse, a "plus icon" appears. Clicking it will let you pick a file on your computer to share it. Anyone with access to this portal will be able to view it.
You can also add files by dragging them onto the block. Multiple file uploads are supported, as well as is dragging a whole directory.
When your mouse goes over a file, you will see a red button with a "trashbin" icon. Click it to delete the file.
Learn more about file sharing in our dedicated article
Customize your portal
With what we've learned so far, you should be able to build something like this in a few minutes:
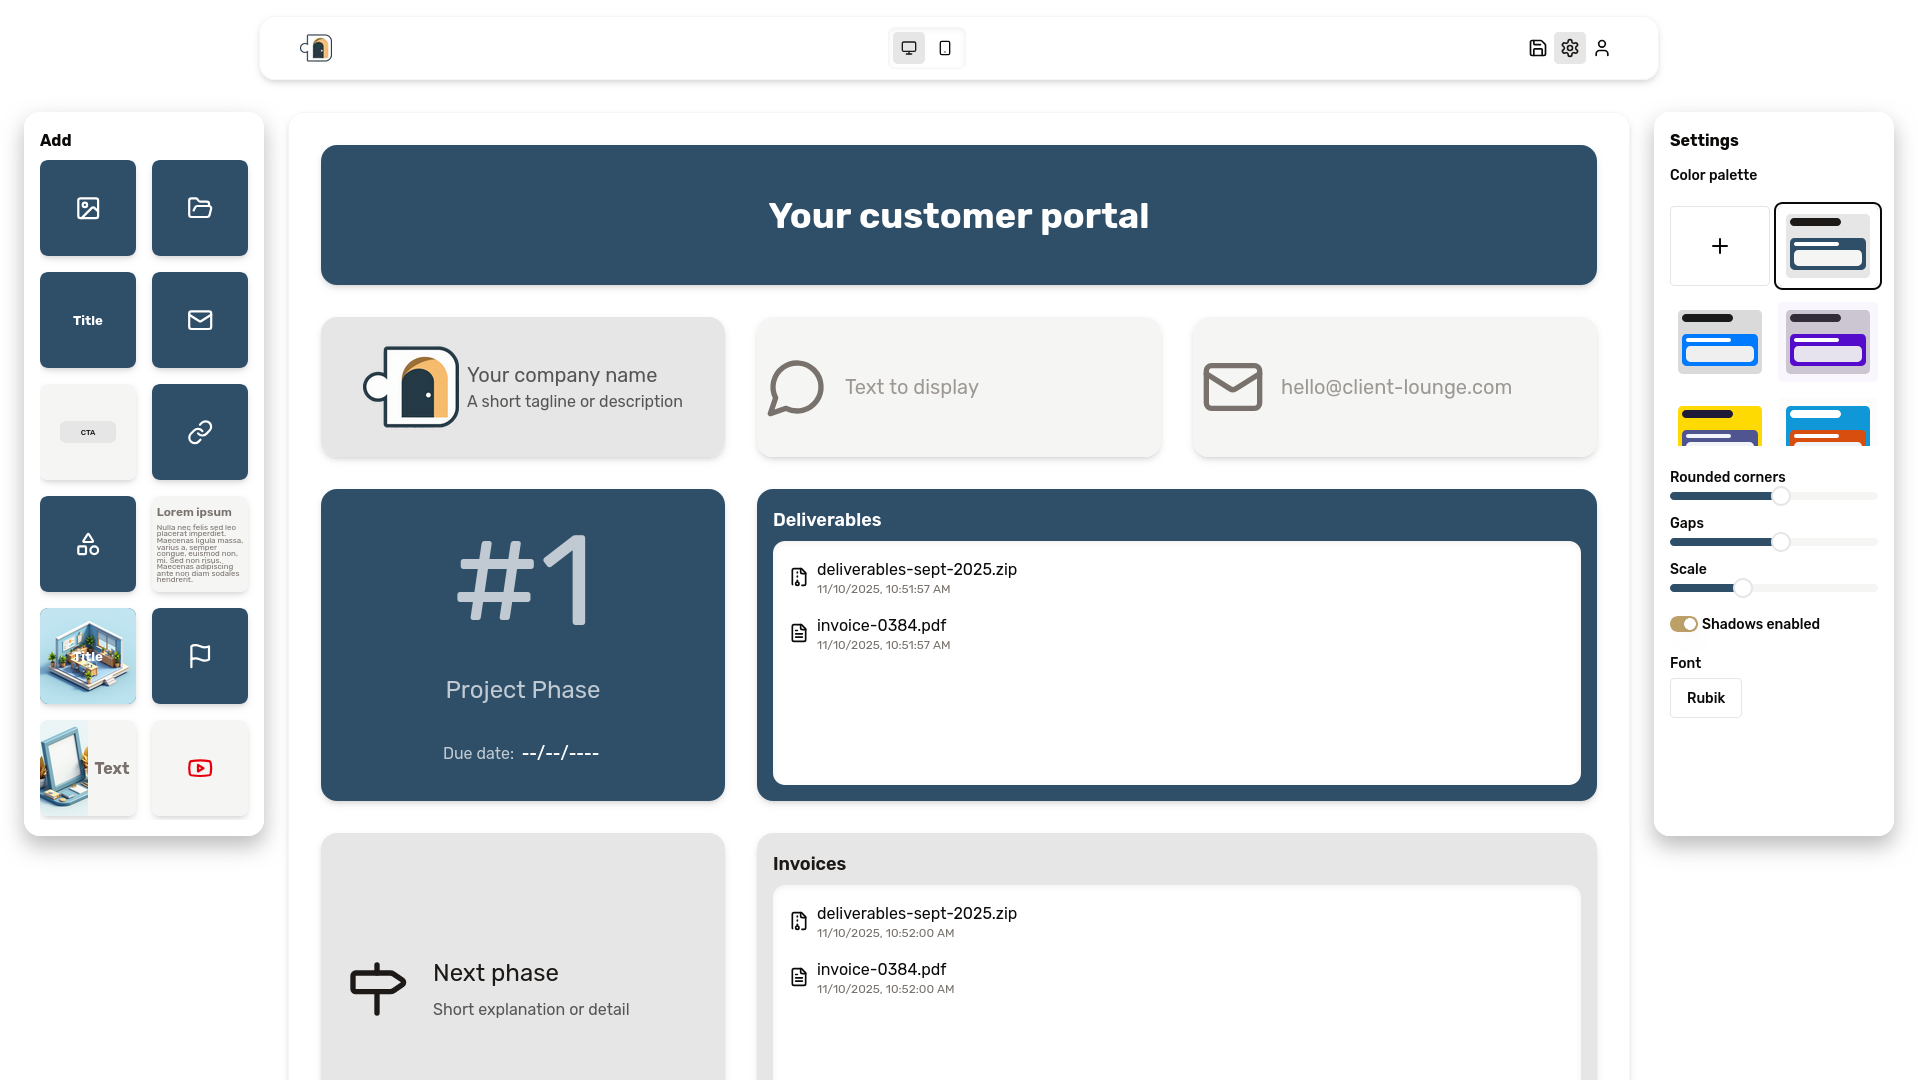
But this is not you. It lacks your unique flair. We'll show you how to make it your own.
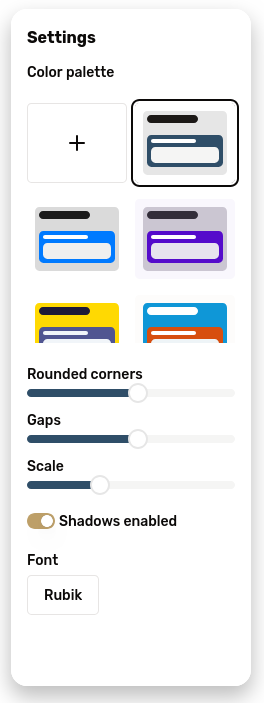
First, you need to open the settings panel by clicking the cog icon. Make sure to have no block selected or focused by clicking somewhere the canvas background, where there are no blocks. You should now be seeing the settings for the portal itself:
The first section of the panel is dedicated to the color palette for your portal's appearance. You can scroll through our presets and choose the one that fits your style best, or even create your own palette by clicking the "Plus" button.
Then we have three sliders to control:
- The roundness of corners
- The gaps between the blocks. Smaller gaps will create more compact and dense layouts.
- The overall scale of the portal. Increasing this will make everything bigger.
Below, a switch lets you toggle the blocks shadows.
Finally, there's a button to pick your font family from our selection.
After a bit of playing around with those settings, you can for example have your portal look like this:
Invite your clients
Once you are satisfied with both the content of your portal and its appearance, it's time to invite your customers to it.
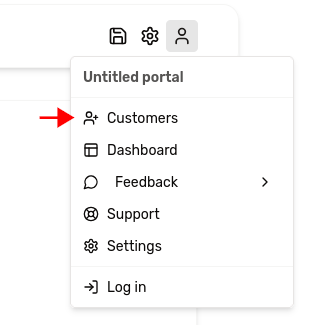
First, you need to open the main menu. It can be done by clicking the rightmost icon in the toolbar. While we're at it, it's probably a good idea to hit the save button.
In the main menu, select the "Customers" item:
A small invite dialog should pop up:
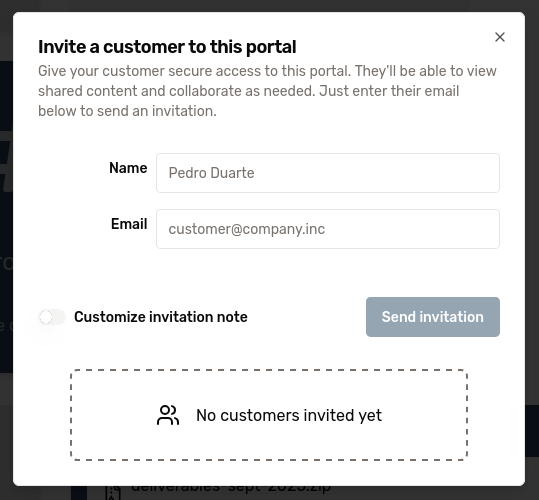
Just fill in your customer's details, hit "invite", and they will receive an invitation by email.
The email they receive will contain a secure link to their portal. Only invited users with permissions will be able to view or download shared files.
Great job! you’ve just created your first portal and shared it with a client!
As you continue exploring, you can fine-tune your portal content, update files anytime, and reuse this workflow to onboard more clients effortlessly.